The Raspberry Pi is a versatile, credit card-sized computer that has captured the imagination of hobbyists, educators, and tech enthusiasts worldwide. This guide will walk you through the basics of setting up your very first Raspberry Pi.
What is a Raspberry Pi?
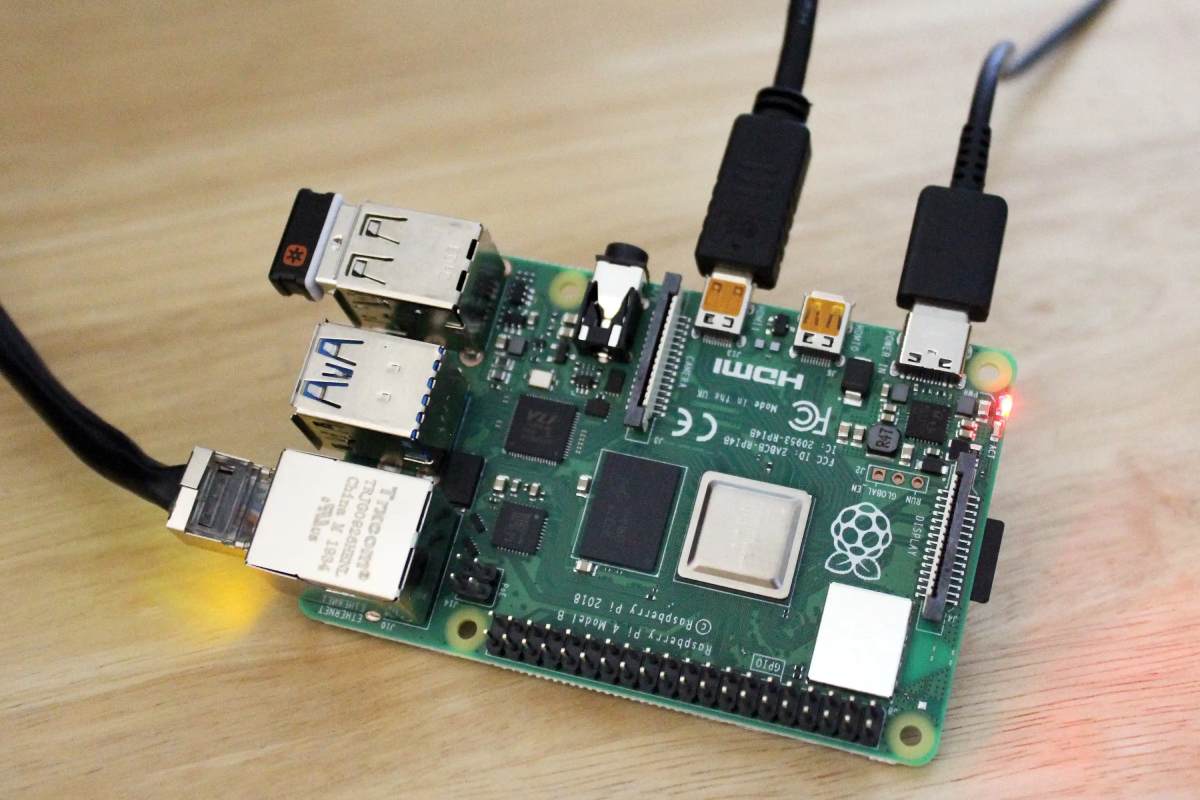
A Raspberry Pi is a small, affordable, single-board computer developed by the Raspberry Pi Foundation, a UK-based charity. It’s about the size of a credit card and was originally created to promote teaching of basic computer science in schools and developing countries. However, it has since gained popularity among hobbyists, makers, and professionals for various applications.
Key features of a Raspberry Pi typically include:
- A processor (CPU)
- RAM
- USB ports
- HDMI output
- Ethernet and/or Wi-Fi connectivity
- GPIO (General Purpose Input/Output) pins for connecting to other electronic components
- MicroSD card slot for storage
What You’ll Need:
- Raspberry Pi board
- MicroSD card (8GB or larger)
- Power supply (5V, at least 3A)
- HDMI cable
- USB keyboard and mouse
- Monitor or TV with HDMI input
- Ethernet cable or Wi-Fi dongle (optional)
Step 1: Prepare the MicroSD Card
First, you’ll need to install an operating system on your MicroSD card. The most popular choice is Raspberry Pi OS (formerly called Raspbian).
- Download the Raspberry Pi Imager from the official website.
- Insert your MicroSD card into your computer.
- Run the Imager, select Raspberry Pi OS, choose your MicroSD card, and click “Write”.
Step 2: Assemble Your Raspberry Pi
- Insert the prepared MicroSD card into your Raspberry Pi.
- Connect the HDMI cable to your Pi and your monitor.
- Plug in your USB keyboard and mouse.
- If using Ethernet, connect the cable. For Wi-Fi, ensure you have a compatible dongle or built-in Wi-Fi (on newer models).
- Finally, connect the power supply to boot up your Pi.
Step 3: First Boot and Configuration
- Your Pi will boot into the desktop environment.
- Follow the initial setup wizard to configure your location, language, and Wi-Fi (if applicable).
- Create a password for the default ‘pi’ user when prompted.
Step 4: Update Your System
Open a terminal and run these commands:
Copy
sudo apt update
sudo apt upgrade
This ensures your system is up-to-date with the latest software and security patches.
Step 5: Explore and Learn
Now that your Raspberry Pi is set up, the possibilities are endless! You can:
- Learn programming with Python
- Set up a media center with Kodi
- Create a retro gaming console
- Build a web server
- Experiment with electronics using the GPIO pins
Remember, the Raspberry Pi community is vast and supportive. Don’t hesitate to seek help on forums or the official Raspberry Pi website if you encounter any issues.
Conclusion:
Setting up a Raspberry Pi is an exciting first step into the world of single-board computers and DIY electronics. With your Pi now ready to go, you’re well-equipped to start exploring its capabilities and bring your creative projects to life.